OPC DA
Overview
OPC is an agreement that uses Microsoft's COM/DCOM technology to achieve automatic control.
OPC DA Introduction
OPC is widely applied to factory control systems such as DCS, SIS and SCADA. OPC DA is the communication protocol that supports the highest frequency among OPC protocols.
OPC DA Feature
- Large transmission volume, with stable and reliable output.
- With DCOM configuration, trouble shooting might not be easy.
- Low security level comes with open permissions.
OPC DA Connection Process

Configuring DCOM
To assure stable commnication between OPC server and client, DCOM conifguration on both sides are necessary.
DCOM configuration on OPC server and client is similar. In this section, we take configuration on server as an example.
Preparation
- Install and configure the operating system according to installation guide and standards.
- An administrator level of account is necessary when logging in to OPC server and client systems, so as to configure user account and DCOM seetings.
- Network connection of both OPC server and client is correct and they can be accessed by each other.
- User account that logs in to both OPC server and client systems must be the same and not empty.
Configuring Component Services
- Search for Component Services in start menu, and then select Component Services > Computers > My Computer.
- Right-click My Computer, and then select Properties.

- Set computer properties.
Default Properties
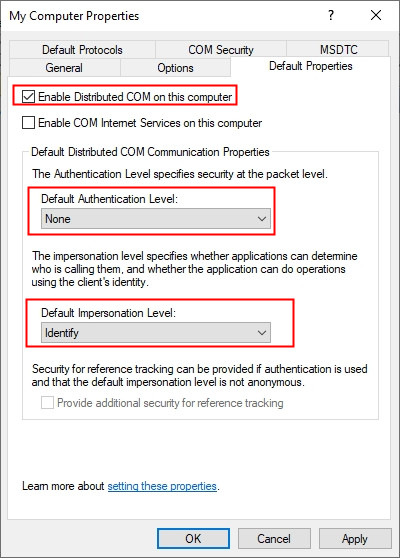
Default Protocols

COM Security
Change limit and default permissions of both Access Permissions and Launch and Activiation Permissions. Click Edit Default under Access Permissions.Changing default permissions of Access Permissions is used as an example.
Following users need to be granted permissions:
- Everyone
- Interactive
- ANONYMOUSLOGIN
- Administrator
- Administrators
- SYSTEM
Follow the steps in the image to grant permissions.

- Under My Computer > DCOM Config, right-click OpcEnum and then select Properties.
- Set OpcEnum properties.
- General

- Location

- Security
Change all three types of permissions to grant to the following users.- Everyone
- Interactive
- ANONYMOUSLOGIN
- Administrator
- Administrators
- SYSTEM

- Endpoints

- Identity
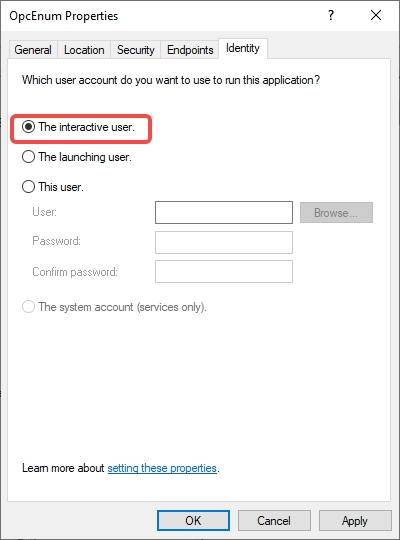 tip
tipIf The interactive user is grayed out, follow the instructions to enable it.
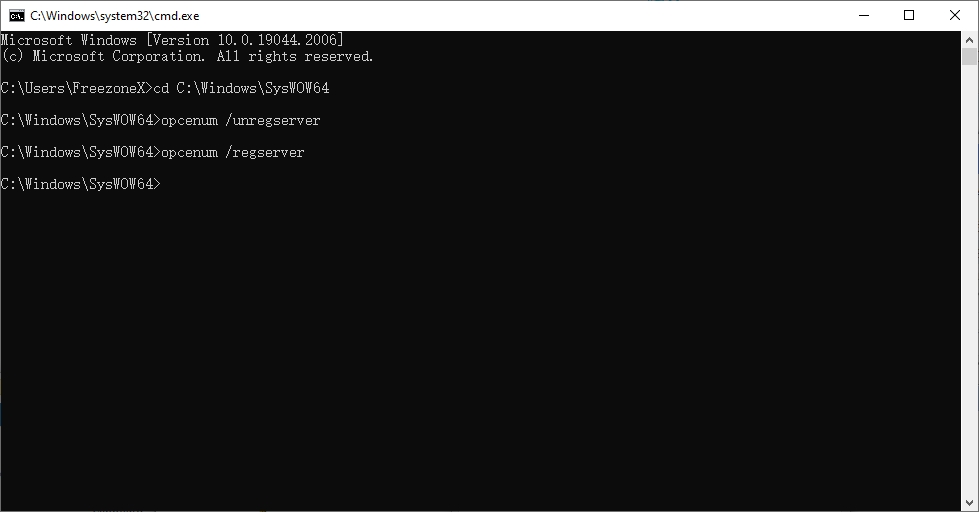
- Search for opcenum.exe, copy its directory path.
- Open cmd, enter the command `cd C:\Windows\SysWOW64 //opcenum.exe directory`.
- Enter the command `opcenum /unregserver` to unregister the opc server.
- Enter the command `opcenum /regserver` to register the opc server again.
Configuring OPC Server Properties
Select Component Services > Computers > DCOM Config, right-click SUPCON.TCSOPCDASVR to edit its properties.
- TCS OPC server is used as an example in this section.
- Configuration of TCSOPC server is similar to that of OpcEnum. For details, see OpcEnum.
Configuring Folder Options
- In file explorer, select View > Options.
- Disable Use Sharing Wizard(Recommended) under View.

Configuring System Services
- Search for Services in start menu.
- In Services window, run the following services.
- Computer Browser
- DCOM Server Process Launcher
- Remote Procedure Call (RPC)
- Remote Procedure Call (RPC) Locator
- Remote Registry
- Routing and Remote Access
- RPC Endpoint Mapper
 tip
tipDouble-click the service and then click Start if the service is not running.

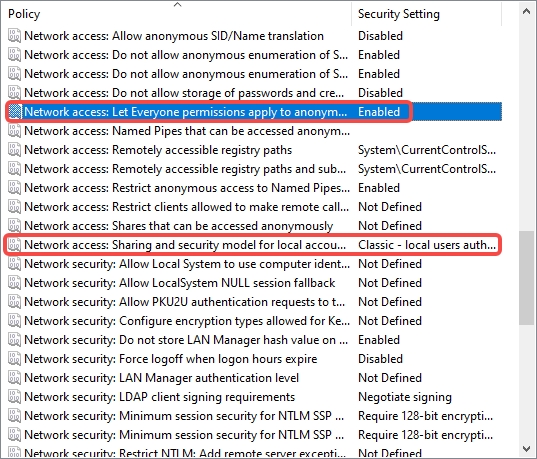
Configuring System Security Policy
- Press windows + R keys at the same time, and then enter
secpol.mscto enter Local Security Policy. - Select Local Policies > Security Options, and then set the following options and corresponding statuses.

Configuring DCOM on OPC Client
Do the same configuration as OPC server. For details, see Configuring DCOM.
Debugging through OPC Client
Debug through OPC client, see if the data can be correctly collected.
- Download and install opc client.
- Run opc client, and then select OPC > Connect.
- Enter the opc server information.

- Select OPC > Add Item.
 info
infoYou can install OPC client on both data collector and engineer station for testing whether the OPC server works properly and whether the connection between them is corrent respectively.
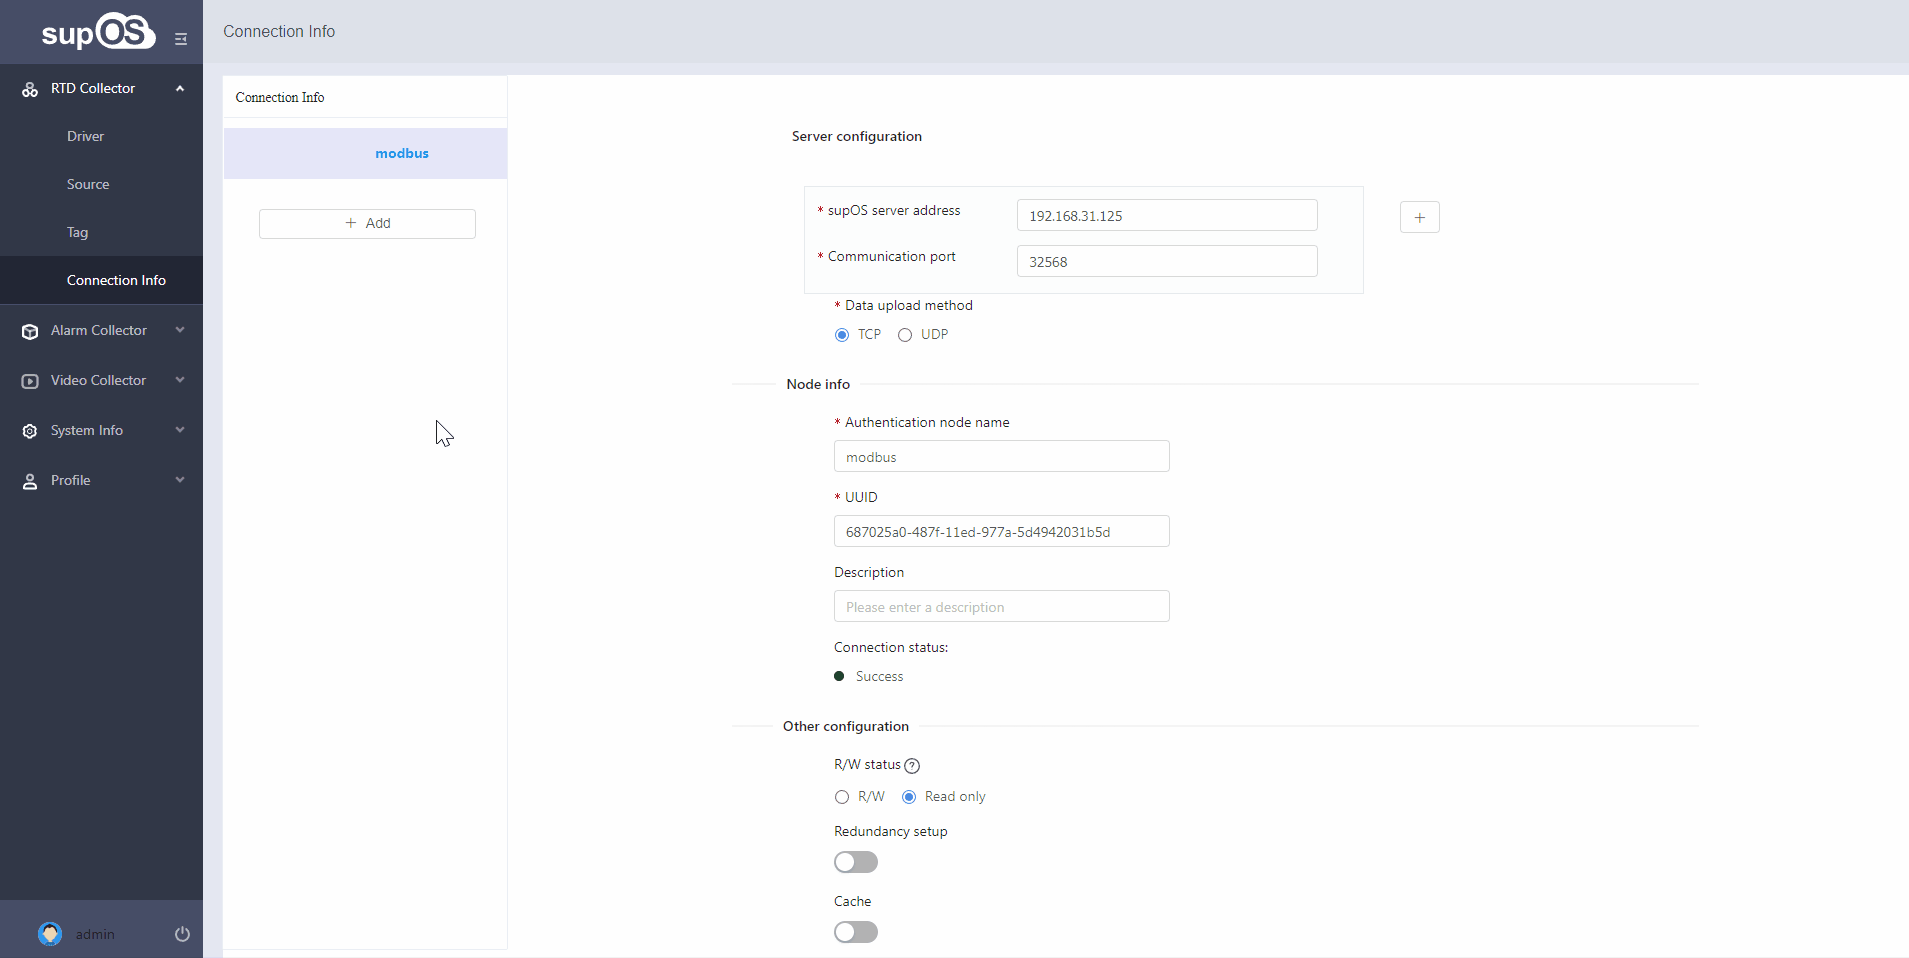
Connecting supOS Platform
- Log in to X-Collector, and then select RTD Collector > Source.

- Synchronize tags connected to the source point.
 info
infoOn the source list, check whether the state of the source point you just added is connected.
- Log in to supOS platform, go to design center and then select Collection Node Management > Authentication to add a collector.

- On X-Collector, select RTD Collector > Connection Info and then connect to the supOS platform.
- On supOS platform, select Collection Node Management > Status, find the collector you added, and then click OK to approve the connection.

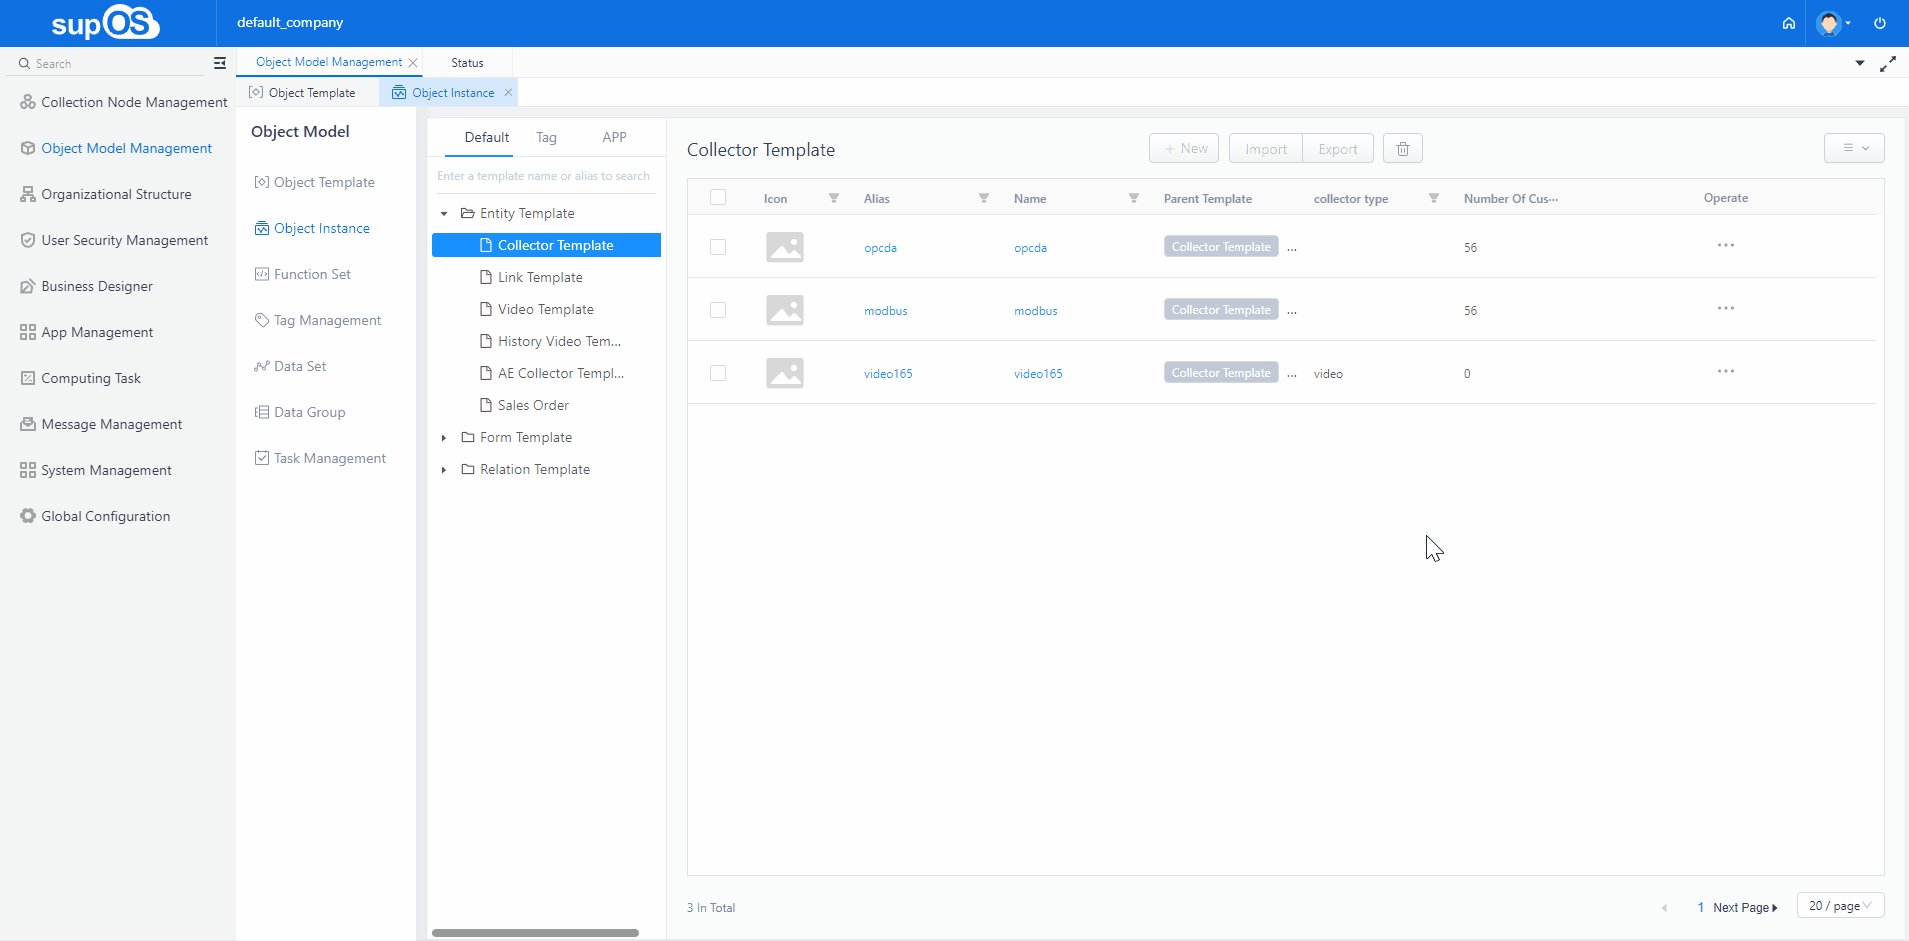
Checking Connection
On supOS platform, select Object Model Management > Object Instance and see whether the tags on OPC server are displayed under Collector Template.